Panel
1. Main Action & Input
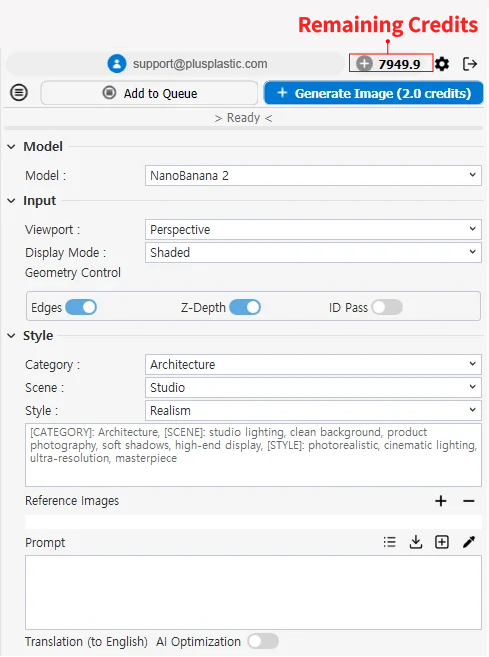
Account / Credits: At the top of the panel, you can see your login details and remaining credits at a glance.
Generate Image: An execution button that ‘starts generating the AI image’ based on all the values set below. The Ready status display at the bottom means the current system is ready to start rendering.
Add to Queue: Adds the current settings to the queue. You can pre-set multiple compositions or style settings and render them sequentially all at once.

Queue List Dialog
A queue management window that monitors and controls the tasks scheduled through Add to Queue.
- Check Queue List: You can check the detailed setting values of each task in the queue, such as image name, prompt, viewport, quality, and selected AI model, at a glance.
- Modify Prompt: Before rendering begins, you can directly double-click and modify the prompt of a pending task on the Queue list.
- Estimated Credit Consumption: You can preview in advance how many credits (Credits) will be consumed when each task runs, so you can efficiently manage batch tasks according to your budget.
Model (AI Engine Selection):You can easily change the AI rendering engine with a single click from the 'Model' dropdown menu. The plugin supports a total of 3 AI engines (NanoBanana, NanoBanana 2, NanoBanana Pro) to suit your workflow needs.
Input:Determines which data from the currently working 3D screen will be delivered to the AI.
- Viewport: Selects the viewport to be used for image generation.
- Display Mode: Selects the display method of the image to be used for image generation.
- Geometry Control: Activates auxiliary data that determines how accurately the AI maintains the shape and structure of the original 3D model.
- Edges: Extracts the outlines and shape map of the model to maintain the structure.
- Z-depth : Extracts the depth map and perspective of the model to maintain a sense of space.
- ID Pass: Divides each part or material area of the model into a color mask to help with individual control. 2. Style and Prompt Settings (Style)
2. Style and Prompt Settings

An area that directs the atmosphere and detailed descriptions of the desired rendering result.
- Category / Scene / Style: Quickly sets the desired direction simply by selecting from the drop-down menus without writing complex prompts. (e.g., Selecting Architecture - Exterior - Realism applies settings suitable for rendering the actual exterior of a building.)
- Category: Architecture, product/jewelry, vehicle/ car
- Scene: Exterior, interior, studio
- Style: Realism, watercolor, oil, sketch, ink, clay
- Reference Images: Through the [+] / [-] buttons, you can add or delete reference external images containing the desired lighting, material, and atmosphere to guide the AI's rendering direction. If you click the attached image, the image name is automatically written in the prompt.
- Detailed Prompt: A space to freely type in specific instructions (specific materials, surrounding environment, weather, etc.) that you want to add directly besides the basic style.
- Eyedropper Icon: When clicked, the ID Pass is activated in the viewport, and by selecting a color, you can automatically input the area color into the prompt.
- Translation (to English) AI Optimization: You can turn the switch on and off to translate the entered native language prompt into English or have the AI optimize the prompt more richly.
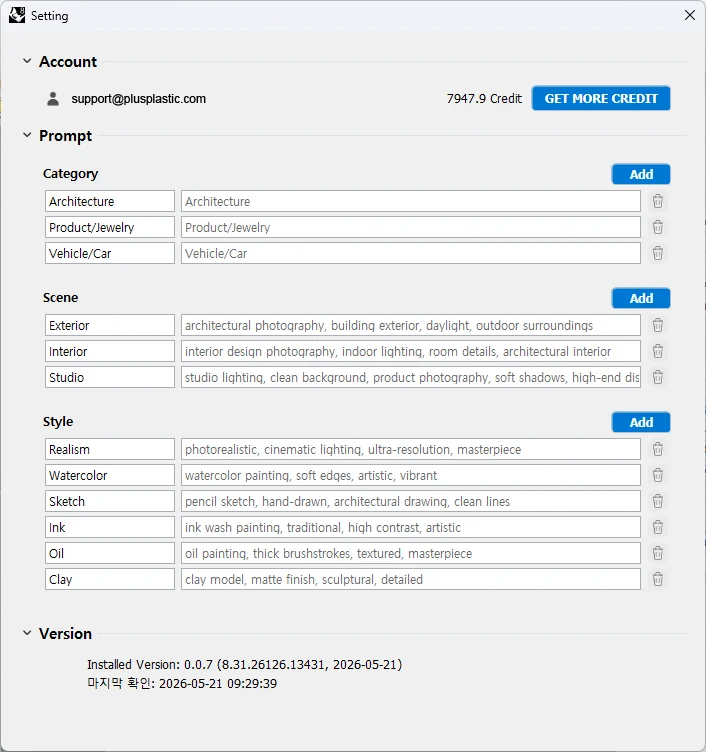
Easily manage prompts and create your own custom presets in the ‘Settings menu’
- Custom Management: Effortlessly add, edit, or remove prompts to suit your needs.
- Personalized Presets: Register specific details or your favorite styles in advance to streamline your workflow.
3. Output & History
Sets the properties of the image to be generated and manages files.
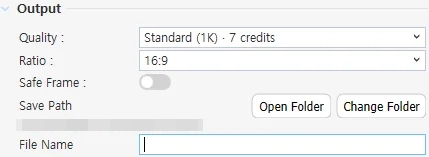
Output
- Quality: Determines the resolution size of the image to be rendered.
- Ratio: Selects the horizontal and vertical screen ratio (Aspect Ratio) of the result image.
- SafeFrame: A SafeFrame switch that allows you to preview the exact ratio and area of the output image on the viewport in advance, and allows precise control of the rendering size.
- Save Path: Shows the folder path on the PC where the generated file will be saved.
- Open Folder: Opens the currently designated save folder with Windows Explorer.
- Change Folder: Designates a new path where the results will be saved.
- File Name: Sets the default name of the image file to be saved.
History
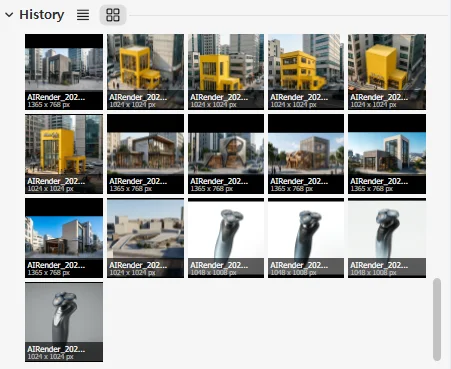
- History: A panel to check the work history of previously generated images. By double-clicking the history, you can recall the prompt and image from that time again.
- View Mode: You can select whether to view the work history as a list or as thumbnail images.